
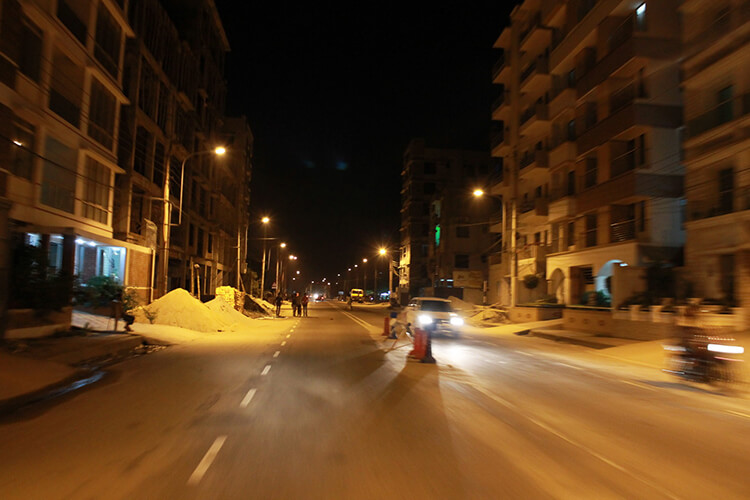
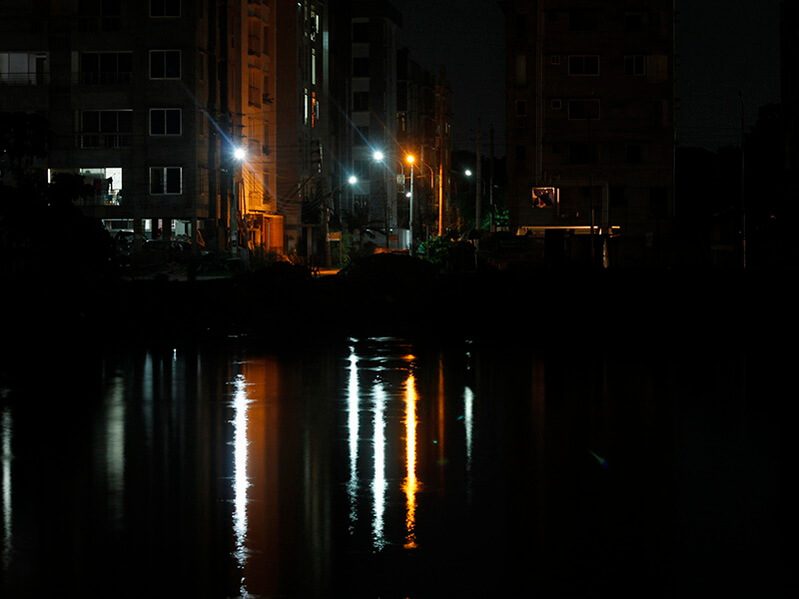
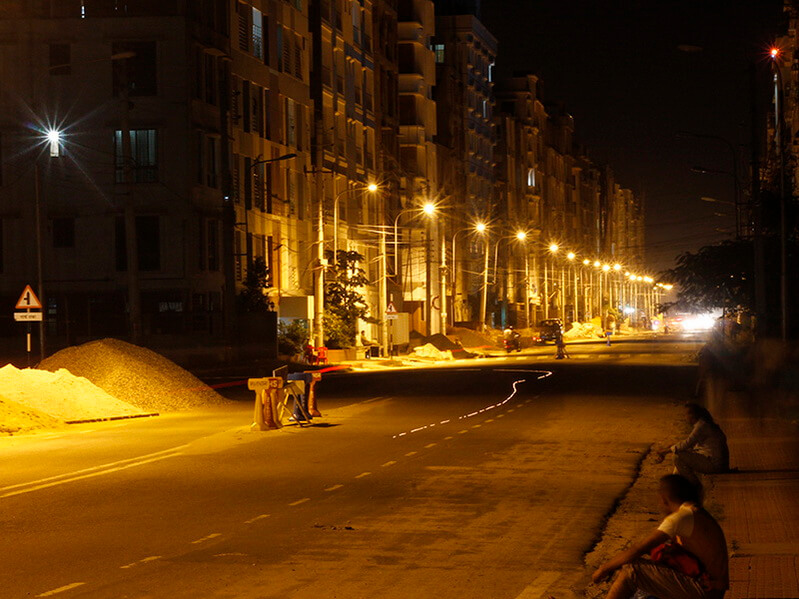
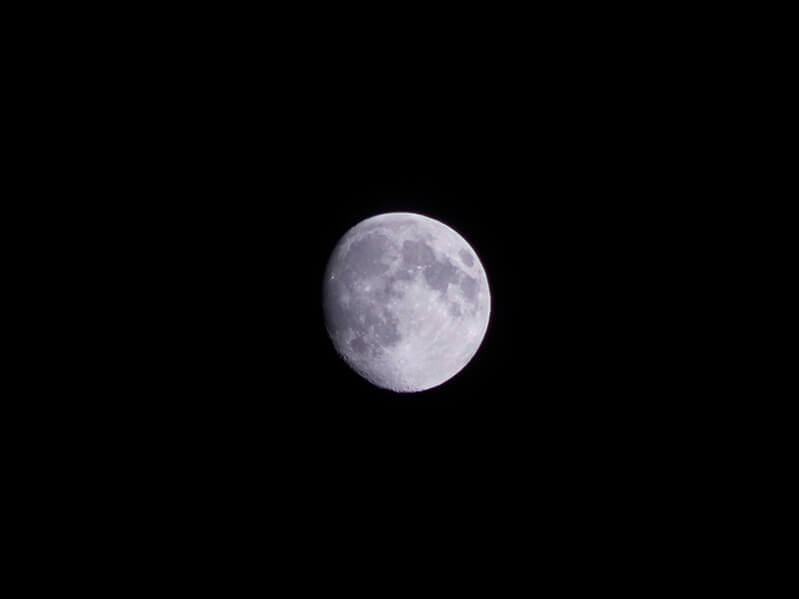
Thanks to Mehedee83 bro for your long exposure shot 🙂
ASIF SAHO, the name refers to a tech lover guy who always likes spending sleepless time with code, travel, bike riding, hangout with friends and reading adventure books.
Was in a awkward situation! Nomally I use my desktop computer and its a pain when I need files from laptop, I started using dropbox for file sharing but it’s not possible to sync my localhost folder via dropbox. Got a solution by adding a virtualhost (a new folder which will act like htdocs) which will stay in dropbox. Pretty easier way to share codes.
1. Open the file with notepad or any text editor.
C:\xampp\apache\conf\extra\httpd-vhosts.conf
2. Copy and paste below codes at the end of the file.
<VirtualHost *:80>
  ServerAdmin [email protected]
  DocumentRoot "D:/Dropbox/Project"
  ServerName projects.me
  ServerAlias www.projects.me
  ErrorLog "logs/projects.me-error.log"
  CustomLog "logs/projects.me-access.log" combined
<Directory "D:/Dropbox/Project">
  Options Indexes FollowSymLinks Includes ExecCGI
  AllowOverride All
  Order allow,deny
  Allow from all
  Require all granted
</Directory>
</VirtualHost>
– Change the DocumentRoot value with your folder link which is standing in dropbox.
– Change the ServerName to the address (without www.) which should be used to open the folder (like: localhost)
– ServerAlias should be same as ServerName but with “www.”
– Also you can edit ErrorLog and CustomLog format if you wish.
Now open the hostfile (C:\Windows\System32\Drivers\etc) and add a line like below (change the address as your need).
127.0.0.1 www.projects.me projects.me
NB: You may not save the hostfile directly, you can copy it to desktop then replace the old file.
Here is a tutorial about troubleshooting, don’t forget to review if get any problem.
আসলে প্রচুর জেকুয়েরী প্লাগিন নিয়ে কাজ করছি এখন, মেজাজটা মাথায় উঠে যখন দেখি একটার সাথে আরেকটা পেচায় নিয়া হ্যাং করে বসে আছে, তো কিছু জিনিস শিখলাম যেগুলো মাথায় রাখতে হয় প্লাগিনগুলো ইমপ্লিমেন্ট করার সময় এবং কিছু ফিক্সিং সিস্টেমও শিখলাম। এই টপিকের উদ্দেশ্য হল সেই ট্রিকগুলো একত্র করা আমি আমার জানা ট্রিকগুলো আপডেট করতে থাকবো এবং টপিকের রিপ্লাইতে আপনারা আপনাদের জানা ট্রিকগুলো দিলে আমি আপডেট করে দিবো, আশাকরি আমার মত পোলাপানদের জন্য এই টপিকটা একটা ডক হিসেবে কাজ করবে।
সাধারনতো জেকুয়েরী প্লাগিনগুলোর কোডে পাচটা জিনিস থাকে যেগুলো গুরুত্বপূর্ন, CSS, jQuery Library, Plugin jQuery Library, Trigger/Initialization আর Source Image and others..
ইমপ্লিমেন্টের সাধারন নিয়ম,
1) প্রথমে জেকুয়েরী লাইব্রেরী ফাইলটাকে HTML পেজে ইনসার্ট করে ফেলুন, <script> ট্যাগ দিয়ে এটা কিভাবে করতে হবে তা নিশ্চই পাঠকগন জানেন 
2) এবার প্লাগিনের লাইব্রেরীটা জেকুয়েরী লাইব্রেরীর পরে যেকোন যায়গায় ইনসার্ট করুন।
3) একটা ছোট ইনিশিয়ালাইজেশন বা ট্রিগার যাই বলি না কেন এটা জেকুয়েরী লাইব্রেরীর পরে ইনসার্ট করুন, যদি
$(document).ready(function() {
  // Handler for .ready() called.
});
এই ফাংশন ইউজ করেন তাহলে অবশ্য এই পার্টে সিরিয়াল মেইন্টেন করার দরকার নেই, কারন এই ফাংশন/মেথডের কাজই হল ডকুমেন্ট পূর্ন লোড হবার পর ভেতরের পার্টটাকে এক্সিকিউট করা।
4) সিএসএস ফাইলটাকে লোড দিন, এটা সাধারনতো কনফ্লিক্ট করে না তাই ঝামেলা কম, তারপরও করলে বুঝতে পারবেন এবং ক্লাসগুলো চেঞ্জ করে দিলেই সমস্যা ক্লিয়ার।
5) এবার ডকুমেন্টেশন দেখুন এবং সেই মোতাবেক HTML মার্কআপ করুন, ডেমো পেজ থেকে ডিরেক্ট কপি করতে পারেন।
6) এক্সারনাল ইমেজ এবং অন্যান্য জিনিসগুলো ঠিকমত লিংক হয়েছে কিনা চেক করে দেখুন এবং ঠিক করে দিন।
ব্যাস এইতো, কিন্তু সমস্যা হল যখন সারা ঘর লেপে দেখা যায় ঠিকঠাক নাই বা আরেকটা প্লাগিনের সাথে কনফ্লিক্ট করছে।
এখন এব্যাপারেই কিছু টিপস।
এবার বড় ভাইয়েরা শুরু করেন আমি আপডেট দিতে থাকি 
What is base 64?
Base64 is a group of similar binary-to-text encoding schemes that represent binary data in an ASCII string format by translating it into a radix-64 representation. The term Base64 originates from a specific MIME content transfer encoding.
Why we will use base 64?
In a website we use many image small images, those images are not heavy weight but browser make one HTTP request per file while its loading. Its very bad, We should try always to make less HTML request.
No need to tell more just go here and submit your image and you will see the code with two format, one for HTML and one for CSS.
Copy and paste then Cheers (y)
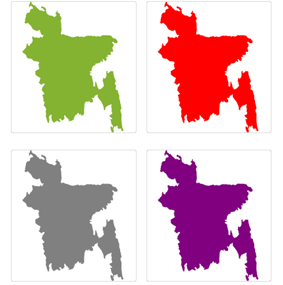
Actually I didn’t find any cross-browser way to colorize a image by CSS.
why we need this? actually I am building a theme and used some map and icons in the theme, when I am creating different color scheme of the theme I thought how about it if I can change the color of the map without using more image?
Don’t worry we will use the transparency feature of PNG file.
Hope you have Photoshop or its cool if you are using GIMP. Open it and open the image. Make transparent the area which will be colorized and fill the other area with background color of your site.
Click here to see the image.
And example is below. I have applied green color via CSS and its working.
![]()
![]()
![]()
![]()
———————————————————————————————————————-
Just add a background color via CSS, below a example with inline CSS,
<img style="background: #84B231;" alt="" src="http://asifsaho.me/app/uploads/2013/07/transparent-BangladeshMap.png" width="283" height="285" />
Ceers!


